Why choose liquid waterproofing?
Rolled membranes can leave weak points at the joints. Liquid waterproofing products, on the other hand, are applied with a brush or roller to form a seamless layer; they offer ease of application in details such as drain outlets, parapet corners and chimney bases.
Application steps
1. Prepare the surface
The surface must be clean and dry. Dirt, moss, grease and loose particles must be removed. On surfaces affected by salt efflorescence or where water is penetrating from the reverse side (negative side), these types of products are not a standalone solution.
2. Repair cracks and details
Cracks and corner transitions must be filled with a suitable repair mortar and chamfered prior to the main application.
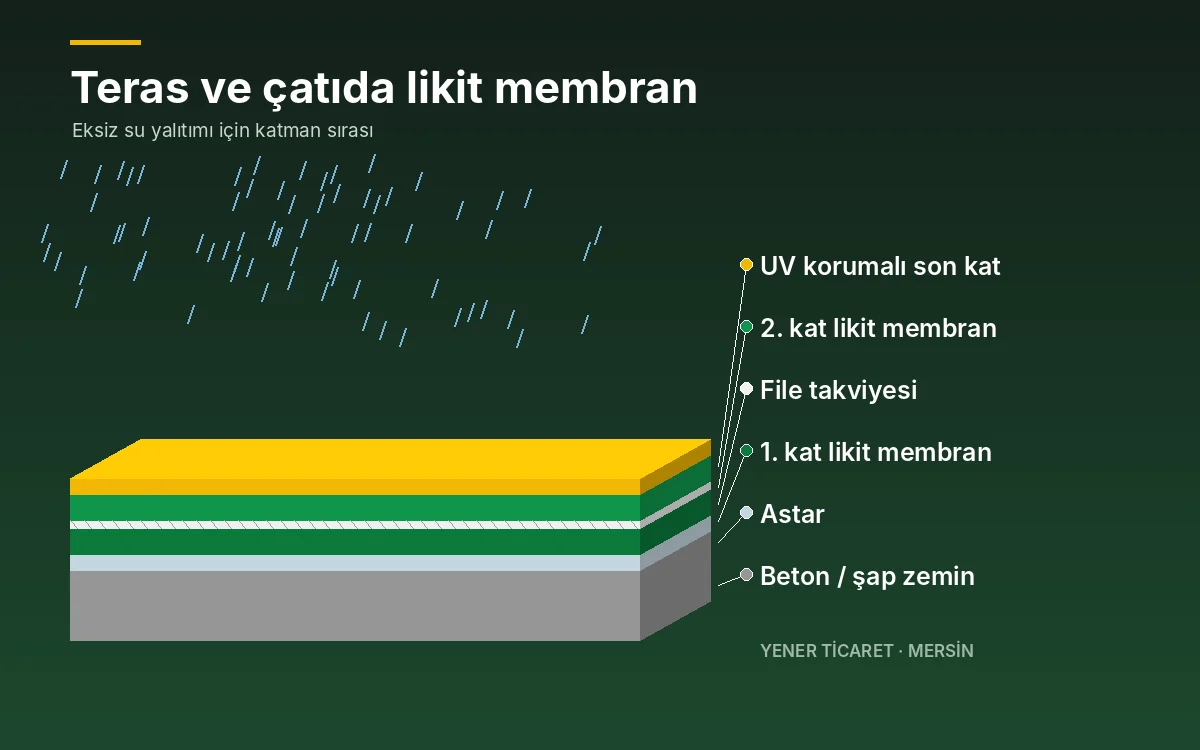
3. Apply a primer
On absorbent surfaces, the primer recommended by the product or a diluted first coat improves adhesion.
4. Mesh reinforcement (where required)
On thermally insulated, wide-spanned or moving substrates, installing insulation mesh whilst the first coat is still wet reduces the risk of cracking.
5. Apply the coats
Adhere to the consumption rates and number of coats specified in the product’s technical data sheet; applying coats at right angles to one another ensures a uniform thickness. Allow the recommended drying time between each coat.
6. Protect
After application, the surface must be protected from rain and mechanical impact for at least the duration recommended by the product.
Weather conditions: Application is generally carried out at temperatures between 5–35 °C. Do not apply on days when rain is forecast or on nights when there is a risk of frost.
Common mistakes
- Applying to a damp surface
- Leaving a thin film by using too little product
- Omitting detail areas (drains, parapets)
- Treating waterproofing as separate from thermal insulation and drainage
Please send us the dimensions and a photograph of your terrace or roof; let’s work together to determine the suitable Isonem product and the estimated quantity.